CTZCC.COM
http://forums.ctzcc.com/

Winter paint project
http://forums.ctzcc.com/viewtopic.php?f=15&t=7091
Page 2 of 4

Author:  mikeatrpi [ Wed Jan 30, 2013 3:33 pm ]
Post subject: 

Yeah I read between the lines from your other paint thread. While a Mercedes is nice, its not what I think of when using the term "Exotic!" Can't wait to see... whatever the decision is I'm sure its worth the suspense!

Author:  Datsun Z Garage [ Wed Jan 30, 2013 7:30 pm ]
Post subject:  re

No fear on the color Frank, yours is safe.

Author:  Datsun Z Garage [ Sat Mar 09, 2013 6:28 pm ]
Post subject:  March 2013

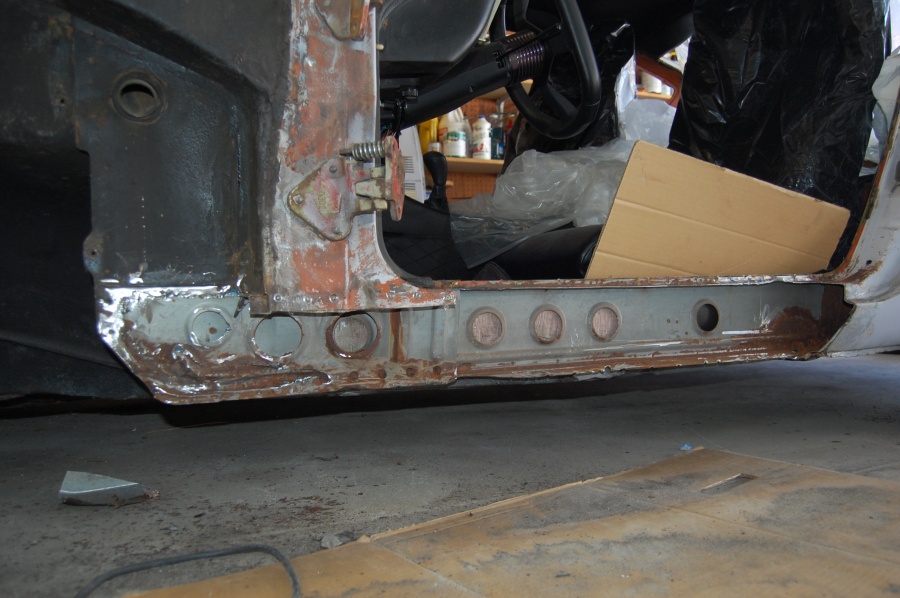
55 degrees today and most of the day to myself! Before I can prime the body I have to complete the bodywork...the sticking point is the driver side rocker panel which needs to be replaced. I have a Tabco replacement ready but I wasn't sure how easy it would be, despite advice from members who had done it.

I had tried drilling out the factory spot welds but they were too hard to find and I was too impatient. So I drilled a slot and used a Sawzall to cut the seams all the way down. Check out the hidden rust!

Image

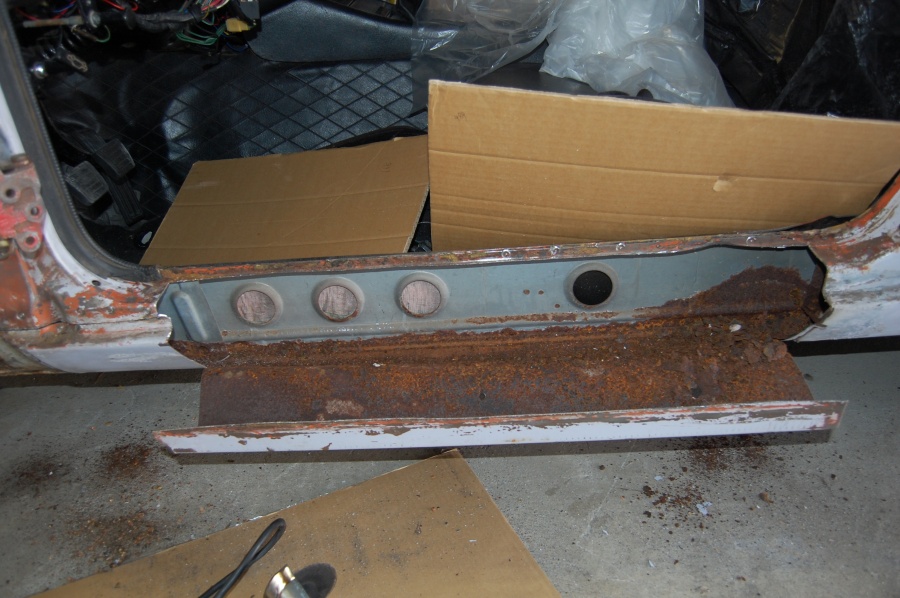
All I had to do to find the bottom spot welds was bend the sill down. I then used a die grinder with 3" cut-off wheel to weaken them. Twisting it back and forth a few times and the welds all broke free.

Image

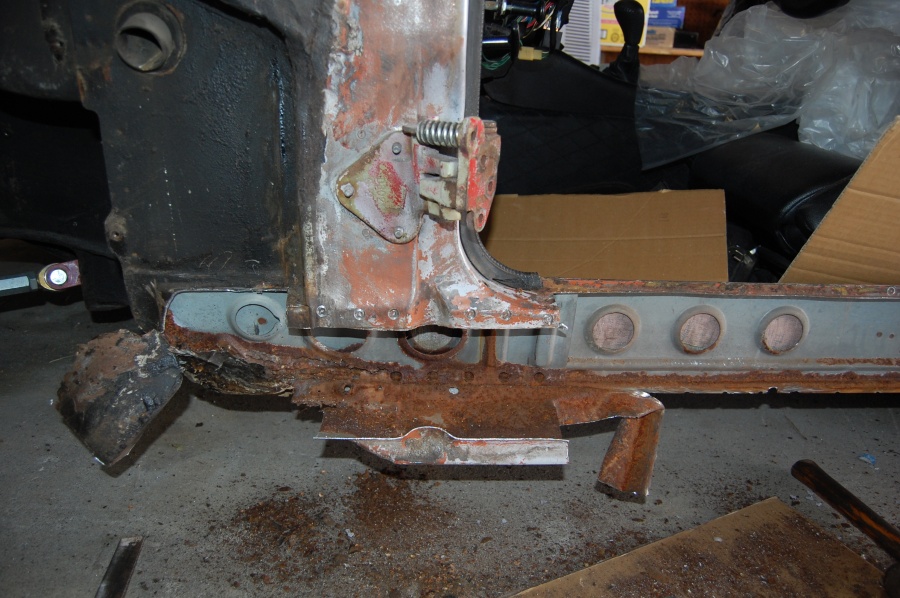
I just continued all the way forward, cutting around the hinge area. I did have to drill out the spot welds there to remove the old sill from underneath.

Image

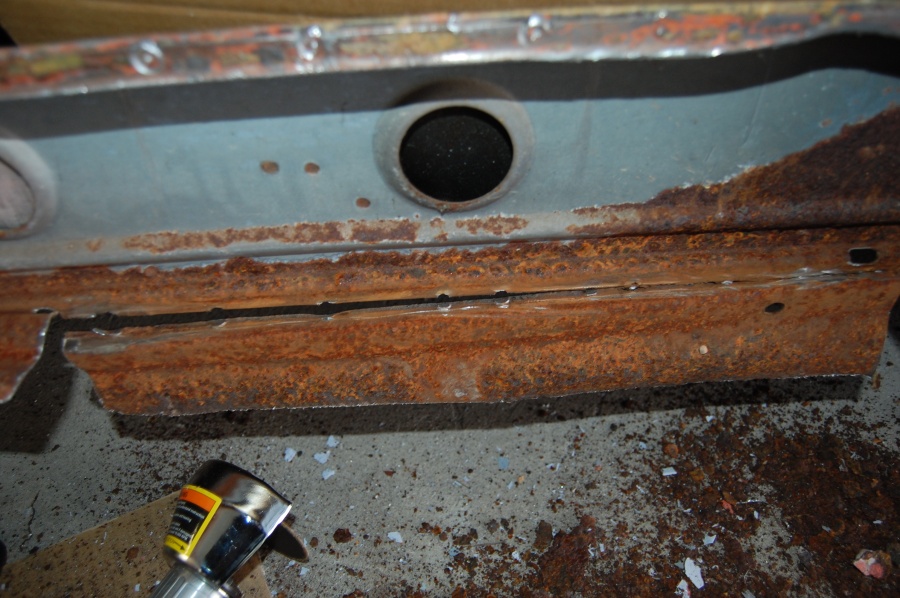
It was way easier to use the Sawzall to get the seams close and simply grind the remaining bits down. This is after using an angle-grinder to clean everything up.I'm going to try and drill out the top of the door sill though, its too thin to grind. I decided the rear dogleg didn't need replacing despite the inner rust.

Image

Author:  Frank T [ Sat Mar 09, 2013 6:35 pm ]
Post subject: 

:shock: Gee, that's scary! I have seen your car up close and never imagined there could be hidden places like that anywhere on the car ("What's a place like you doing in a car like this?").

I suspect you'll still shoot some magic juice into that dogleg as long as you have it open? Maybe even run a foxtail drillbit in there to clean it off to bare metal first?

Well, look ~ don't despair. There's a good side to this; rust weighs a lot less than metal does, so your car actually performs better that way! :lol:

Frank

Author:  Frank T [ Fri Mar 29, 2013 8:18 pm ]
Post subject: 

Any progress on this?

Author:  Datsun Z Garage [ Fri Mar 29, 2013 8:58 pm ]
Post subject:  Mar 29

This thread is titled Winter Paint Project but I'm still at the bodywork stage. The warm weather has jump-started it, I'm hoping to start shooting primer in late April. In the meantime...........

Using these inexpensive welding clamp pliers is a must. They don't just hold the panel in place, they squeeze the seams together allowing you to spot weld. I can't imagine this repair without this simple tool. A 4 1/2" angle-grinder with a cutoff wheel is also indispensable as is a spot weld drill bit. BELOW: I cut the end of the new rocker off because I didn't plan on replacing the dogleg behind it...until I took a close look at the dogleg (see below) .

Image

Here's how the new rocker fits in place. I had to clean up behind the hinge area with the grinder so the rocker would fit underneath smoothly.

Image

I am using short-strand fiberglass filler to cover all holes and gaps around the car and to repair surface level problems. The filler is "USC Pro-Glas" if you're interested. Once I grind down the welds, fill and prime, this area will be immaculate. This area will receive epoxy primer to seal everything.

Image

Simple spot welds all the way down. I used a Hobart flux-core welder with excellent results. Not seen here: I had to use the welding clamps across the bottom of the rocker to pull the seams together so I could spot weld it from end to end...underneath from the back side.

Image

The 43 year old rocker contained a 1/2 cup of sand and dirt that got in somehow...needless to say...its being replaced. I used the spot weld drill bit along the edge and the old dogleg peeled right off. I'll be using my angle grinder to cut just below the blue line. Once I install the new dogleg and fill the seams and rough spots, it should all look factory.

Image

This is the stripped hood. The front edge need some filler...someone probably sat on it years ago. I'm using Evercoat Rage Gold filler...which was recommended over all others. The stuff is amazing and sands instantly...pure magic compared to the auto store filler we all grew up with ( B***o.) I will be using epoxy sealer over all this, followed by high build urethane primer.

Image

Author:  Filipe [ Fri Mar 29, 2013 9:17 pm ]
Post subject: 

How DOES the rust get in there??

Author:  jhagani [ Fri Mar 29, 2013 10:30 pm ]
Post subject: 

Hey Bryan:

That's for the tip about Evercoat Rage Gold - it's amazing how bad and outdated B**D* is and how little is known about modern alternatives.

This is a terrific project - I'm looking forward to watching it every step of the way towards completion.

- Jim

Author:  Frank T [ Sat Mar 30, 2013 8:42 am ]
Post subject: 

Incredible.

Where did you learn to do bodywork?

Author:  Paul [ Sun Mar 31, 2013 7:40 pm ]
Post subject: 

It's like for goodness sake lady, put your clothes back on. :shock: It looked good, but now it will be better, keep up the good work. :wink:

Author:  Frank T [ Thu Apr 11, 2013 8:51 pm ]
Post subject: 

Who makes the rocker panels? I can't read the decal.

Author:  padam07 [ Thu Apr 11, 2013 9:18 pm ]
Post subject: 

Tabco. I purchased a set of dog legs from them. I never used them because I sold the car before hand. I guess these are the same panels that you get if you buy them from MSA.

http://www.tabcobodyparts.com/html/tabl ... ntents.htm

Author:  Frank T [ Thu Apr 11, 2013 9:25 pm ]
Post subject: 

I wonder if there's any value in spraying some cheap expanding foam in there, like "Great Stuff", to keep moisture and dirt out? It wouldn't weigh anything.
Might even help with sound deadening.

Author:  Datsun Z Garage [ Sun Jun 16, 2013 10:14 pm ]
Post subject:  Almost there

Well.....by the time you read this my winter paint project should be taking the next giant step. Tomorrow morning (Monday) I plan on shooting primer. I'm using the Restoration Shop line of paints sold online by TCP Global...epoxy primer will go on the hood which was stripped, and hi-build primer on the rest of the car. Stay tuned.

BELOW: beginning the masking. BTW, I'm shooting outside in the driveway using the old school/open-air method: my garage is attached and I don't trust paint solvents in there. No fear...any junk that ends up in the primer will sand out.

Image

BELOW: A Still Life. The mask uses 3M filters rated for isocyanates. Devilbiss FLG-3 with 1.8 tip, 1.5 will be used on the topcoat.

Image

Author:  Frank T [ Sun Jun 16, 2013 11:34 pm ]
Post subject: 

:thumbs_up:

Be sure to mask your wheels and tires.
I'm very interested in how you will shoot your hatch.

Page 2 of 4 All times are UTC - 5 hours
Powered by phpBB® Forum Software © phpBB Group
http://www.phpbb.com/