Welcome to the Connecticut Z Car Club Forums


Username:  
Password:  
Log me on automatically each visit
Register 
It is currently Sat Apr 27, 2024 11:09 am
Welcome to the Connecticut Z Car Club Discussion Forums   
If you have trouble logging in or encounter any issues, please send an email to webmaster@ctzcc.com.

All times are UTC - 5 hours


Post new topic Reply to topic  [ 8 posts ] 
  Print view Previous topic | Next topic 
Author Message
 Post subject: 
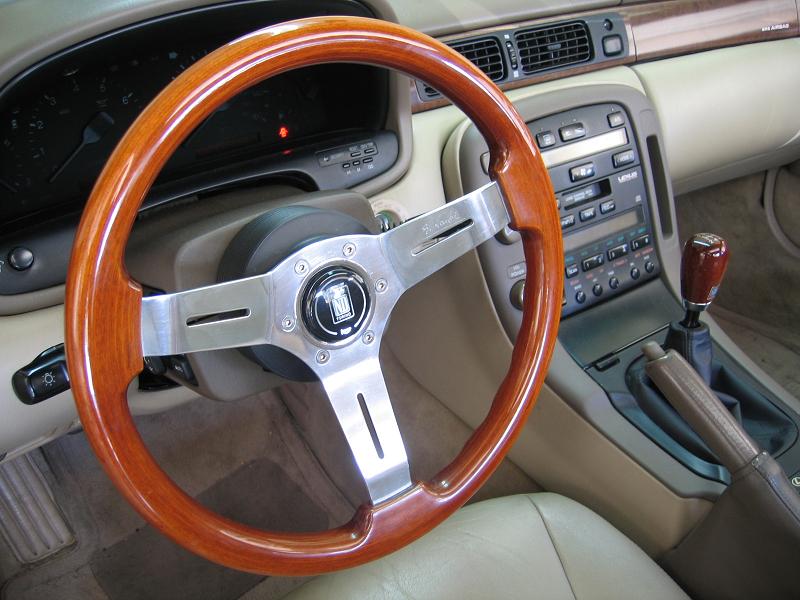
Gen One Steering Wheel
PostPosted: Thu Dec 17, 2009 8:59 pm 
Offline

Joined: Fri Nov 14, 2008 1:50 pm
Posts: 605
Location: Putnam Valley, NY
Although I did buy a Momo wheel for my 72, I did want an original wheel because my 72 didnt come with its wheel. I managed to get a gen one wheel that needed work. The wood was rough, gray, and very dry. It looked like driftwood. The paint on the spokes was chipped and rust was evident. The horn button emblem was almost completely peeled of its field of black paint. Clive was kind enough to pass the wheel on to me.

Having never restored a steering wheel, I wanted to try it out. I was anxious, so I went out to the garage and explored my stock of supplies. I found a can of Boiled Linseed Oil and some sand paper. I sanded the wood rim a little and rubbed on some Linseed Oil which really brought out the color. I wasn't happy with the level of gloss though. I wanted a high gloss acrylic look similar to a Nardi wheel. The following day, I sanded the wheel again and tried to encapsulate the entire rim with two part epoxy resin. I brushed it on and it really looked great. It took a long time with a small brush to get an even coat all the way around. After an hour, the epoxy was setting up and the wheel looked great....UNTIL, some of the Oil from the Linseed Oil I had used was causing the epoxy to "fisheye". Uh oh. Overnight the epoxy hardened to a beautiful, rock hard glossy finish that was full of ridges, runs, and fisheyes! OH NO!!! :cry:

I panicked for a day and then decided to hand sand it all smooth again. A sore wrist and shoulder later, and three sheets of 320 and 220 grit paper, I got the layer of epoxy leveled out.

I went back to my shelf and found a can of high gloss clear. I sprayed it over the sanded epoxy and it looked BRILLIANT. I let it set overnight, did a second coat, let it set, and then taped it off so I could spray the spokes with Dupli-Color Semi Gloss GM Black. I also used the Semi Gloss on the horn button emblem. After I painted the horn button emblem with the black, I took a can of Flat Clear and speckled the emblem to create a texture. I then highlighted the tops of the DATSUN letters with a silver paint marker.

I am really happy with the result. Right now it is displayed proudly on my fireplace mantle.

Image

Image

_________________
-Dave
76Z Turbo'd
72 In Progress---DONE!


Top
 Profile  
 
 Post subject:
PostPosted: Thu Dec 17, 2009 9:18 pm 
Offline
User avatar

Joined: Sat Oct 17, 2009 7:18 pm
Posts: 121
Location: Trumbull
Nice Work. You wouldn't happen to have a before picture would you. I think it would be neat to see the comparison between the two pics.


Top
 Profile  
 
 Post subject:
PostPosted: Thu Dec 17, 2009 10:37 pm 
Offline

Joined: Sun Sep 20, 2009 7:19 pm
Posts: 1301
Location: 5 mi. from Frank
Sorry you went to all that trouble.
I would have swapped you a '72 wheel from our partZ car even up for
your Series 1 wheel. (Trying to get all the partZ for our '70 lined up
in case I decide to return it to original.)

All Z Best,......................Kathy & Rick

_________________
All Z Best,.......Kathy & Rick

1969 Z.CAR (#00013 10/69) 8/30/76
1969 ITSA.Z (#00171 11/69) 8/24/73
1970 OLD.Z (#06289 6/70) original owner
1971 510 2dr since 12/31/75
1969 1600 rdstr (our 160-Z)
1971 (#19851 1/71) sold
1975 75.Z (#01343 1/75)


Top
 Profile  
 
 Post subject:
PostPosted: Thu Dec 17, 2009 10:44 pm 
Offline

Joined: Fri Nov 14, 2008 1:50 pm
Posts: 605
Location: Putnam Valley, NY
Kathy&Rick,
I dont consider it trouble...I like this sort of thing. Anyhow, check with Clive, he may have a gen one wheel for you.

I regret not having taken before photos. The wood looked gray, colorless, and felt rough to the touch. The spokes were badly chipped and had rust on their edges. Whoever drove this car must have worn a lot of rings on their fingers! :lol: The horn badge was about 70% silver from where the black paint had chipped off.

_________________
-Dave
76Z Turbo'd
72 In Progress---DONE!


Top
 Profile  
 
 Post subject:
PostPosted: Thu Dec 17, 2009 11:03 pm 
Offline

Joined: Wed Apr 09, 2008 5:53 pm
Posts: 14781
Location: CT
Now THAT is a very nice job! Sincere congratulations on a beautiful result.

Last year (2008) we hosted a New Jersey fellah named Bob Nelson at one of our monthly meetings. Bob restores old Z steering wheels and roadwheels, either steel or aluminum. His work makes them look better than new, regardless of their original condition. I wish I had a link to his business down there in Joisey. Many members of our sister club the NJZCC use Bob for restoration work on their wheels. I hope Ross arranges to have Bob come back for another demonstration at one of our 2010 meetings.

Yeah, Bob's looked slightly better than yours does, but he uses machines and charges a few hundred dollars for a restored wheel. You did very nearly as well by hand and no doubt saved yrslf a pocketful of cash.

Some of Bob's very interesting presentation gave us full details on what type of composite materials are used to make these steering wheels, and what chemical compounds and techniques work best on them.

Frank


Last edited by Frank T on Thu Dec 17, 2009 11:14 pm, edited 1 time in total.

Top
 Profile  
 
 Post subject:
PostPosted: Thu Dec 17, 2009 11:12 pm 
Offline

Joined: Wed Apr 09, 2008 5:53 pm
Posts: 14781
Location: CT
And it occurs to me to ask if your horn button stays on or not? If the inside plastic rings are cracked (like 99% of them are), you can secure them this way ~

wrap the button in a clean shop cloth to protect the vinyl covering:

place a 4" hose clamp around the ring, including the cloth. Tighten the clamp only enough to hold the cloth on;

squirt small amounts of Gorilla Glue, Lok-Tite, or epoxy cement into the cracks in the plastic rings inside the button;

tighten the clamp slowly, watching the cracks. Tighten only as much as needed to compress the cracks together;

lay it on your shop bench and go do something else for two days.

Come back and release the clamp. Your button will now stay on the steering wheel without falling off and hitting you in the crotch when you drive over bumps.

Life is better that way (Voice of experience).


Top
 Profile  
 
 Post subject:
PostPosted: Fri Dec 18, 2009 12:42 am 
Offline

Joined: Fri Nov 14, 2008 1:50 pm
Posts: 605
Location: Putnam Valley, NY
Frank so far the horn button stays on at up to, walking speeds, of 2 mph. :lol: I haven't tried any high speed J-walking yet. Thanks for the tips. I will definitely make sure that I try one of those tricks if it falls off. I think I can improve my wheel restoration quality quite a bit the second or third time around. This one was really an experiment in different methods, but I like what I got, despite the trial and error. Also, I was not going for the original look. I wanted the Nardi wheel look.

Image

There are other factors that I can't test yet...heat stability and UV resistance. Anyone want to ship me and my wheel to the Caribbean for testing? :?:

_________________
-Dave
76Z Turbo'd
72 In Progress---DONE!


Top
 Profile  
 
 Post subject:
PostPosted: Fri Dec 18, 2009 12:53 am 
Offline

Joined: Wed Apr 09, 2008 5:53 pm
Posts: 14781
Location: CT
Now THAT thing make me want to DRIVE.


Top
 Profile  
 
Display posts from previous:  Sort by  
Post new topic Reply to topic  [ 8 posts ] 

All times are UTC - 5 hours


Who is online

Users browsing this forum: No registered users and 31 guests


You cannot post new topics in this forum
You cannot reply to topics in this forum
You cannot edit your posts in this forum
You cannot delete your posts in this forum
You cannot post attachments in this forum

Search for:
Jump to:  


Powered by phpBB © 2000, 2002, 2005, 2007 phpBB Group
mile200 v1.0.1 designed by Team -Programming forum- .